Showing posts with label vegetarian. Show all posts

Friday, January 17, 2014

Day 2: Vegetarian Quinoa Chili

Courtesy of ww.twopeasandtheirpod.com/ 
Day 2 out of 7 of Ariel's home cooking adventure. Day 1 was a great success, providing me with delicious leftover pork chops with apples and onion for lunch on Day 2. Continuing with the healthy, simple meal theme, I decided to cook up a new favorite chili recipe of mine which I discovered on Two Peas and Their Pod. I love that this chili is packed full of veggies and protein rich quinoa. One of my problems with other veggie chili recipes is that it can be more soup-like due to the lack of ground beef. The quinoa comes in and adds this great texture, in addition to the protein punch. It really mimics that chunky beef chili consistency. I love that quinoa is being incorporated into more and more recipes (ancient grains revolution)! And not all quinoa recipes "taste like a dirty old tree branch" (see video below).


This recipe includes a plethora of veggies: carrots, celery, zucchini, onion, and peppers. This recipe is great in that you can totally swap out any veggies for others that you prefer (I omitted the celery). And it really comes together in a cinch. Plus you have leftovers the next day (which tastes even better). I think one of the keys to successfully eating at home is to cook meals that will provide you with some extras, so you're not constantly cooking every night or making lunches everyday. 

This quinoa chili really hit the spot on the cold winter night. I served it up with some blue corn chips (whole grain party!)

Tuesday, April 16, 2013

A Taste of India - Punjabi Style

Naan (left) and chana masala.

I love having vegetarian friends over for dinner. First, because our vegetarian friends are awesome. Second, because it forces me to think a little outside of the box when I am planning a meal. Indian cuisine is very vegetarian friendly and I had made chana masala with some success in the past, so I decided to build my meal around an Indian theme. The majority of the Indian food that we eat in the U.S. is Punjabi cuisine. Punjab is a very fertile, agricultural state, known as the "Granary of India" or "India's bread-basket". One of the most popular breads is naan. I saw a recipe for naan in Bon Appetit magazine that piqued my interest. So with chana masala and naan on the menu, I chose saag paneer to round things out and provide some greens. 


Naan cooking in my cast iron skillet.
Some notes on the naan first. Leavened breads are always a little intimidating, especially ones that are cooked in a tandoor, but I like a challenge. This recipe is made like typical bread recipe, but only requires one rise. To mimic the clay oven called the tandoor, the recipe recommended using a cast iron skillet. I recommend seasoning your skillet the day before, not while you are trying to make the dough (woops). Luckily, the skillet browned the bread nicely. The bread was soft with a little chew, but I felt like it was a little denser than what you find in restaurants. However, when I made these two days later I cooked them using a pizza stone with better results.

Saag paneer (literally spinach cheese)
The chana masala and the saag paneer utilized many similar ingredients: coriander, cumin, ginger, and chiles. This masala (spice mix) provided similar flavor profiles, but the tomato sauce in the chana masala gave it an acidic spin, whereas the saag paneer utilized paneer (or in this case tofu) and yogurt which mellowed the spice and heat a bit. Both dishes were tasty and I could easily have doubled the chana masala for our dinner party of four. To help with the heat, I made my own raita using whole milk yogurt, cucumber, lemon juice, and mint. 

Happy diners!
Three hours later we served up our Indian feast with a delightful Jarvis Merlot. So maybe my menu was a little ambitious for a weeknight, but it sure was fun! I really enjoyed stepping outside of my comfort zone and trying some new recipes.

The final product. Amanda brought some delicious green beans! 


Sunday, March 31, 2013

Goat cheese and chard and herbs oh my!

NY Times picture perfect pie.
I have so many bon appetit magazines, cookbooks, and food blogs for meal inspiration, that it can be overwhelming to choose one! I usually spend a little time (oh maybe several hours) perusing recipes and end up picking the one that looks like the most fun to make. When I saw this beautiful savory pie in the NY Times Health section, I thought, "I must make this crown of phyllo!" 

This recipe is essentially a quiche with a phyllo crust. I honestly cannot remember using phyllo dough ever, with the exception of when I helped my mom make baklava when I was 13. This was part of the excitement with this recipe was trying a different kind of crust, plus I just loved the way this looked in the picture (spoiler alert: my crust didn't turn out as perfect as the NY Times pic). Phyllo dough is a thin sheet of pastry made from wheat, water, and a little bit of oil. The sheets are super thin and dry out easily. The tricky part is layering the dough without tearing it. Each layer is brushed with a mixture of oil and butter to keep the layers together and so that they brown in the oven. 

Once you have layered the sheets to form a crust, you can start pulling the filling together. First, the swiss chard is chopped, blanched in boiling water, and transferred to ice water (this stops the cooking process). The crucial step is to squeeze as much water out of the chard as possible, so your crust doesn't become soggy. Second, you blend the eggs and goat cheese together in a food processor. Third, you add the chard and chopped herbs (I used tarragon, chives, and parsley). Then pour into the crust and bake.

That crust is overphyllo-ing.
As you can see the layers of my crust weren't as pretty as the NYTimes pic. However, I am fairly confident the flavors were similar. The phyllo makes for a particularly crunchy crust. And I especially enjoyed how the tarragon worked with the goat cheese. While traditional dough is probably what I prefer I would definitely make this again, especially when I am in the mood for something lighter (and easier to make).

Sunday, January 20, 2013

Ad Hoc Inspired Salad - Beets, Avocados, Blood Oranges

Ad Hoc inspired salad.
This weekend AJ and I took a short trip up to Napa to see some East Coast friends of ours. When our friends invited us to dinner in Napa on a Friday night I was initially a little hesitant. Driving up to San Fran on a Friday from Mountain View is a nightmare, so Napa would only be worse. Plus, I had just taken a lot of time off for the holidays and wasn't sure about taking more time off from work. But then two very important things happened. First, our friends emailed to say they wanted to make reservations at Thomas Keller's Ad Hoc. And second, AJ said, "Are you saying you DON'T want to go to Napa?" Thank you husband of mine for slapping some sense into me.

"Bears, beets, battle star galactica."
 AJ and I had been to Ad Hoc for brunch two years ago during a trip to Napa with Malia. For those of you who have never been, Ad Hoc does a four-course, family-style, California cuisine. You are given no choice about what to eat, but I have never heard anyone complain about their meal. For brunch, we had their epic chicken and waffles. This meal was perfect after a day spent wine-"tasting" the entire day prior. So I was excited to experience their dinner.


Close up. Ahhh yeeeeaaah.
We arrived at dinner after a impromptu tasting hosted by Somerston winery at our hotel. The cab sav we tried was nice, but the reason I would visit their winery is for the opportunity to ride ATVs through their vineyard and hang with their sheep. Needless to say after a few glasses of vino, I was ready to eat. Luckily, we didn't have to figure out what to eat! AJ and I decided to split the wine pairing. Our first course was the salad, which turned out to be my favorite part of the meal. I know that sounds crazy, but the salad featured perfectly ripe avocados, blood oranges, golden beets, toasted hazelnuts, pomegranate seeds, mixed greens, and quinoa. The dressing was a citrusy vinagrette and we were offered a creme fraiche to drizzle over top. This salad was creamy, crunchy, bright, tart - essentially exploding with flavor, but perfectly balanced. While the dishes that followed - the pork, cheese plate, and apple crisp - were all delicious, I knew I wanted to recreate that salad.


Flavors melding in the bowl.

The salad I recreated on Sunday was an inspiration, not to be confused with a replica. I used some ingredients I had on hand, supplemented by purchases at the farmer's market. The focus was on avocados, beets, and blood oranges (Side note: I can't think of beets without thinking of Jim's imitation of Dwight on the Office.) I added some mixed greens, thin slices of fennel, and toasted almonds to the mix. I dressed them with a meyer lemon and garlic vinagrette. I also made a "creme fraiche" dressing in addition. At Ad Hoc they served the salad with a side bowl of an herby creme fraiche. I didn't have creme fraiche, so I mixed pepper goat cheese with olive oil mayo and meyer lemon juice. It was delightful. I love when you can find inspiration at restaurants and recreate the dish in your own home. I served this salad with a nice slice of pain au levain and a Torrontes wine. NOMS!


Monday, September 27, 2010

Heat Wave in Northern California - Dishes to Help You Cope


Virgin mojito - my relief from the heat

This summer has generally been rather cool, only occasionally rising above 80 degrees. As a former Virginian a typical summer day is in the mid-90s combined with unbearable humidity. So you can see why I don't usually bat an eye when the thermometer creeps up to the upper 80s. However, as the months go by the wussier I seem to get. This weekend's high of 90 degrees had me begging for A/C.


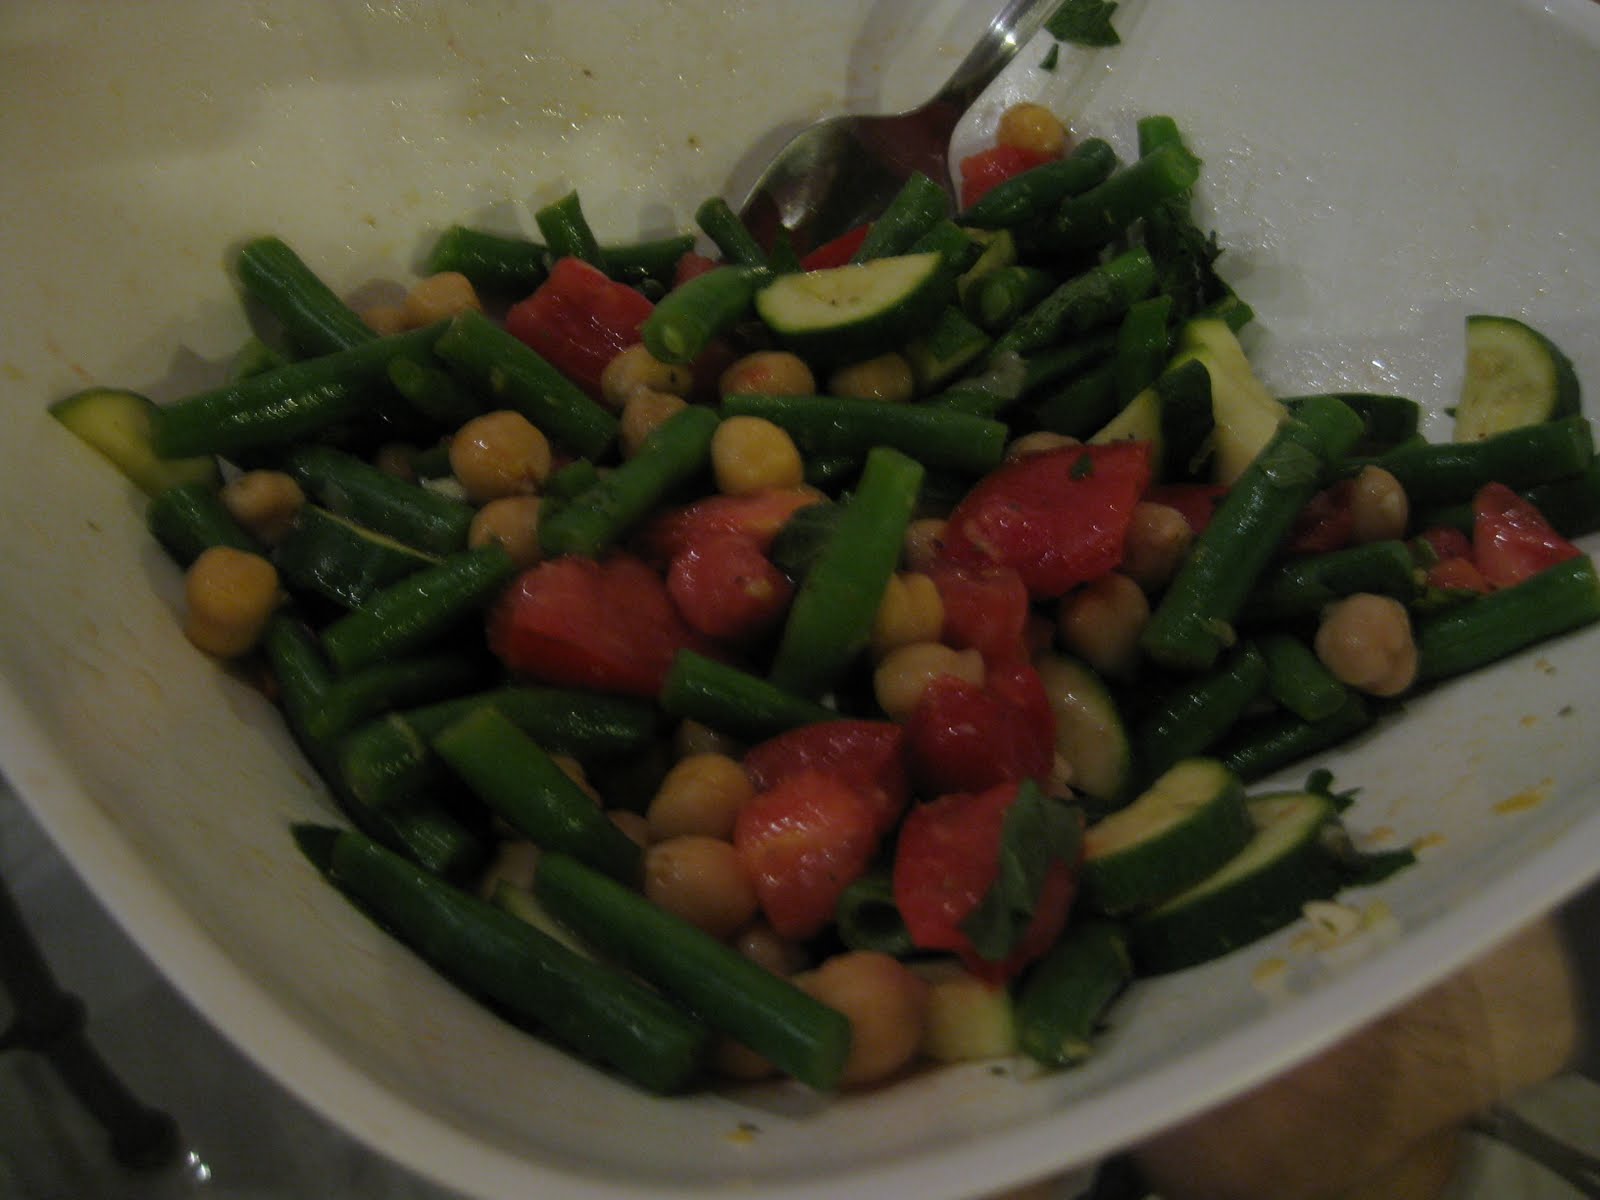
Green bean, zucchini, tomato, chickpea salad.

Now in Virginia I could crank up the A/C all I liked, but in the San Francisco Bay area A/C is a rarity. With no respite from the heat, I prefer to keep my oven and stove off. But a girl gets hungry (and thirsty), so here are some nice dishes (and drinks) to keep you cool.

The green bean salad was a concoction I threw together when I got home from work. I had just gone to the farmer's market on Saturday so I had some nice green beans, zucchini, and heirloom tomatoes. But trust me, this salad would be just as lovely with some broccoli or maybe some cucumbers and bell pepper. The key is the simple dressing which adds such depth of flavor (BONUS: and little fat). I serve this salad with a nice loaf of multigrain bread (from the store, because who wants to bake in this heat?)

My favorite drink to accompany this beauty of a salad is the virgin mojito. Now don't get me wrong if you're feeling the need for some rum, I enjoy those too. But when it's really hot alcohol will just make me sleepier. The combination of mint, lime juice, club soda, and just a shot of sprite is so refreshing.

Green Bean Salad

1 zucchini
1/2-3/4 lb green beans (trimmed of ends)
1 heirloom tomato (diced)
1/2-3/4 can of chickpeas (6-8 oz)
1 clove garlic (minced)
1-2 tbsp mint (chopped)
1/4 tsp ground black pepper
1/4 tsp salt
zest of one lemon
juice of one lemon
1/4 cup olive oil
3 tbsp red wine vinegar


Place an inch of water into a large pot with a steamer to place the vegetables on. Bring to a boil. Take the zucchini and cut into 1/4 in rounds and slice those into half moons. Cut green beans in half or thirds. Place vegetables into pot and steam for 5-7 minutes (depending on how crunchy you like your vegetables). Set aside to cool for a couple minutes. Chop tomato, mint and mince garlic and set aside. Zest the lemon and pour lemon juice into a large bowl. Add the olive oil, red wine vinegar, garlic, salt, and pepper and mix until thoroughly combined. Drain chickpeas. Add steamed vegetables, tomato, chickpeas, and mint to the vinaigrette in the bowl. Toss to combine. Serve with bread and cheese.

Virgin Mojito
1 lime
3 ice cubes
couple sprigs of mint
club soda
sprite

Take a glass and fill with juice of half a lime, torn mint leaves, and a shot of sprite. Muddle in glass with a spoon. Add ice and club soda. Enjoy!


Perfection in a glass.

Sunday, August 1, 2010

I love summer...


Heirloom tomatoes with goat cheese and pesto, spanish tortilla, white corn

I absolutely adore summer, especially in California (you know where the temperature rarely reaches 85 degrees). AJ and I have gotten in the habit of frequenting the Mountain View farmer's market every Sunday. It is a lovely little ritual. We get some fresh air and sun, while picking up fresh produce for that evening's dinner. AJ bought me some lovely sunflowers. I didn't realize it until we brought them home, but they're actually dyed with a pink water to get that vibrant orange color!

We also picked up some blackberries, raspberries, peaches, dates, heirloom tomatoes, basil, potatoes, eggs, white corn, and onion. I knew I wanted to do a twist on the caprese salad for dinner, but wasn't sure what else to make.


Corn for the corn! I love those corn holders.

Potatoes have made a comeback as one of my favorite foods, especially after Heather made some delicious roasted ones with chilis. I had never made a spanish tortilla before, but was suddenly inspired to make one after picking up some beautiful yukon golds. For side dishes I sliced the tomatoes and topped them with peppercorn crusted goat cheese and my own basil pesto. This combo is absolutely divine! The tortilla came together fairly easily. I sauteed the onion with olive oil and boiled the potatoes for 3-4 minutes before adding them to the onions, with some garlic. I recommend letting the onions get fairly brown and caramelized - the flavor is worth the wait! Our meal was so simple, but so flavorful.


Close-up of the tortilla.

We topped our meal off with some watermelon and dates. A sweet end to a sweet meal.


I look a little tired from my run. That melon revitalized me.

Spanish Tortilla

3 medium sized yukon gold potatoes
1 large yellow onion
2 cloves garlic
4 eggs
1 tsp salt
1/2 tsp pepper
Olive oil

Directions

Boil a pot of water. Heat 3 tablespoons of olive oil in frying pan on mediumheat. Cut potatoes in half, then slice them crosswise into thin slices (matchsticks) and boil for 3-4 minutes. Drain potatoes in colander. Cut onion into thin slices and sautee in pan for about 5-6 minutes. Add potatoes and garlic to the onions and cook on medium heat for another 7-8 minutes. Remove from pan and let cool in colander.

Mix 4 eggs in a large bowl with salt and pepper. Add onion and potatoes and mix with eggs. Add 2 tablespoons oil to frying pan. Add egg mixture to frying pan and cook for 5 minutes. Take a plate and place it over the pan. Invert the pan and tortilla onto the plate. I put tin foil on the plate. This made it easier to add the tortilla back into the frying pan and cook for another 4-5 minutes. Cut into wedges and serve warm.

Wednesday, June 9, 2010

Summer is Here - First Caprese Salad of the Year!


Clockwise (from left): toasted Henry's Harvest bread from Grace Baking Co., sunflowers, sauteed asparagus and cauliflower with garlic, and caprese salad.

There are so many wonderful things about summer - corn, berries, peaches, but one of the best things is ripe heirloom tomatoes. One of my favorite dishes is the caprese salad. I know what you're thinking, that played out salad that you see on every italian menu in town is getting you excited? And trust me you can really mess this dish up. But the key to making this simple dish is using really good ingredients. I head to the farmer's market for some amazing heirloom tomatoes and fresh basil.


Caprese salad close-up: Heirloom tomatoes, mozarella, basil, and balsamic vinegar.

Using fresh, exceptional ingredients makes a simple salad a really amazing meal. I drizzle a little balsamic vinegar on top of the sliced tomatoes and mozarella and torn basil leaves. It is just wonderful! I toasted up some bread, sauteed some cauliflower and asparagus and my vegetarian feast was ready. Also, I just love the colors, don't you?

P.S. Malia get ready for some wonderful Cali eats!

Thursday, February 11, 2010

A nifty way to eat your brussels sprouts


Health gurus are always pushing leafy greens on us. Although incorporating things like kale and brussel sprouts into your diet can seem intimidating, all you need is a good recipe. I never cease to find inspiration for vegetarian dishes from 101 Cookbooks. And if you don't like the recipe I post here, please check out the website, I guarantee you'll find something you like.

Now back to the brussels sprouts. I always enjoyed brussels sprouts as a kid, and maybe that makes me one of the weird ones, but I think preparation can make all the difference. If you don't like steamed or boiled brussels sprouts, try shredding them and sauteeing them. I find this gives them a sweeter flavor.


For this dish, I took inspiration from 101 Cookbooks' Shredded Brussels Sprouts and Apples. Brussels sprouts and apples are in season. The dish is really rather simple - chop up a bunch of veggies and apples and saute them with oil, lemon juice, garlic, salt, pepper and the secret ingredient - maple syrup.


I used brussels sprouts, carrots, apples, toasted cashews and tofu in my saute, but feel free to experiment. The maple syrup adds this lovely caramelization. I would also recommend using a hickory baked tofu, as it totally complements that maple flavor. To add in some whole grains serve up with some quinoa or brown rice.


Shredded Brussels Sprout Saute
Adapted from 101 Cookbooks.com

1 large apple, julienned (I used a Pippin)
2 large carrots, julienned and cut into 2 in lengths
1 lemon, juiced
4 oz extra firm tofu, cut into cubes (I recommend a baked hickory)
a couple pinches of salt
2-3 tsp olive oil
3 cloves garlic
2 tablespoon maple syrup
1/3 c toasted cashews
12 oz (or 3-4 handfuls) brussels sprouts, washed and cut into 1/8 in ribbons

Cook the tofu in a large skillet over medium high heat with a bit of salt and tsp olive oil. Saute until golden, about 4-5 minutes. Add the carrots and saute until start to soften, 5 minutes. Turn heat down to medium and add apples, garlic, and maple syrup and saute 2-3 minutes. Transfer mixture into a large bow.

Turn heat up to medium high and add brussels sprouts with 1-2 tsp oil, salt. Cook for 2-3 minutes. Add 1 tbsp maple syrup. Add tofu-apple mixture back to skillet and heat for another 2 minutes. Sprinkle cashews on top.

Remove from heat and serve immediately with quinoa.


Sunday, September 27, 2009

Broccoli Cheddar Quiche and French Onion Soup


A couple of weeks ago I finally saw Julie and Julia. While the movie didn't blow me away, it was a fun movie about food. And let's be honest I love watching things involving food or cooking or baking. (Also, Meryl Streep is amazing in this movie! She totally captures the essence of Julia Child.)

For those of you who saw Julie and Juila, didn't it make you feel like making something a little challenging? I woke up the next morning with the intention of hunkering over the stove for a couple hours, perhaps even getting down and dirty with some dough. Luckily it was a Sunday, the perfect day to spend some serious hours in the kitchen. I know I am talking up the amount of work, but I was actually looking forward to spending my day cooking, a Sunday tradition that has been lost in the wake of prepackaged meals and the tendency to eat out. While Julia inspired us to cook, food television of late has had the opposite effect, so it seems. (Check out this article if you're interested in learning about how time spent in the kitchen has decreased considerable since the 1960s).

Alright, off of the soapbox and back to the kitchen. Julia inspired me to try out some french cooking. I had some beautiful vidalia onions that I needed to use, and decided they would be a lovely french onion soup. I got the most recent issue of Gourmet magazine celebrating seasonal recipes using produce from the lovely intersection of late summer and early fall harvest. I decided to try my hand at my first quiche - a broccoli cheddar recipe. Two simple yet classic french recipes - would I manage to cook both of these up in one day?

I began with the soup - slicing onions incredibly thin and then sauteeing them with butter and sugar to the point of caramelization. I continued to add wine, mushroom broth, a little balsamic vinegar, and thyme. The room filled with a wonderful aroma - there is something so comforting about making soup.


With the soup simmering on the stove, I began working on the pie crust for the quiche. Gourmet magazine features a rather traditional pie crust using butter. I love butter pie crusts -the flavor is so much better than one made with shortening.

The idea of making a pie crust can be quite daunting, but I think most people find it rather easy to pull together once they get started. A couple of tips: 1) Make sure your butter is very cold - this makes for a nice flaky crust and 2) don't use too much water - you want to use just enough to pull the dough together (too much yields a tough pie crust).

After making the dough you want to let it rest in the refrigerator for 30 minutes or so (Gourmet says 1 hour, but 30 minutes works just fine). Once you roll the dough out, place it in a pie plate and prick the dough with a fork (to allow steam to escape during baking). At this stage, you will chill the dough again for 30 minutes. Take the pie crust out and bake for 20-25 minutes.


While the pie crust was bakin, I began to make the filling for the Broccoli Cheddar quiche. The filling is rather simple as well - a mixture of eggs, broccoli, half-and-half, cheese, garlic, and nutmeg. When the pie crust has cooled, pour the filling into the shell and bake at 375 degrees for 45 minutes. My quiche came out wonderfully -AJ loved it. The eggy custard was light yet creamy. The combination of broccoli, cheddar, and garlic was classic.

The soup was lighter with the use of mushroom broth, but still wonderful with the carmelized onions and salty swiss melted on top. Give French cooking a try, I do think you'll like it!

Thursday, August 27, 2009

Eggplant salad with toasted garlic pita chips


Eggplant salad.

"Salad? B-O-R-I-N-G." Like me, you may be a little tired of the usual leafy green salads. When it comes to salads, I often find myself in a rut. Baby spinach - been there. Arugula - done that. Don't get me wrong, I still find myself eating them, because they are an easy way to get in a lot of veggies, but I needed more inspiration.

That is when the wonderful Mark Bittman came to the rescue. You may have seen his NY Times article on "101 Simple Salads for the Season". Seriously, there are so many possibilities that I had never thought about.


Homemade tzatsiki verus storebought hummus (there's only so much a girl can do).

I found myself drawn to the "simple" mediterranean flavors of #27. Another great thing about these salad recipes - they are only a couple sentences in length. No stressing over minute details! I blackened a whole eggplant in a skillet and finished cooking it in the oven until it began to deflate. While the eggplant was in the oven, I chopped cucumber, tomatoes, and mint. I opened up a can of white cannelini beans and mixed all these together with olive oil, lemon juice, garlic, and salt. When the eggplant was super soft, I took it out of the oven and removed the charred skin. I chopped up the flesh and tossed it with the other ingredients.

I decided to toast up some pita chips to go with the salad. For the finale, I made my own tzatsiki - a simple mixture of greek yogurt, shredded cucumber, garlic, lemon juice, salt, and a drizzle of olive oil.

What can I say, this salad rocked my tastebuds. The eggplant was sooo smoky. You know that wonderful flavor you get from baba ganoush - finally I get how they do it! The mint added this amazing freshness. The tzasiki gave this extra creaminess in contrast to the acerbic lemon and garlic.

Bottom Line: Try this salad and you won't regret it.

Saturday, May 30, 2009

A Twist on Pad Thai


Fresh mint, chives, and cilantro totally make these noodles!

The inspiration for my most recent noodle dish comes from the popular Pad Thai dish. Pad Thai is a great first introduction to Thai cuisine for those afraid of the heat from thai chilis. Usually a combination of rice noodles, lime juice, fish sauce, garlic, a little chili pepper, cilantro, peanuts, and shrimp or pork.

My recipe took a liberal interpretation of pad thai, using a stronger peanut flavored sauce that I had in the cabinet, adding in peanut butter, lime juice, garlic, and chili paste. In substitution of shrimp and pork, I sauteeed a bunch of carrots, squash, and mushrooms. I also used whole wheat spaghetti because that's what I had in my cabinet. The addition of fresh cilantro, mint, and chives at the end really made this dish. The bright herbs mellowed out the rich peanut sauce. I also made this noodle dish a lot spicier than a traditional pad thai. You can use less paste if you desire less heat.


Peanut noodles with veggies and fresh herbs.

Recipe for Spicy Peanut Noodles with Vegetables and Herbs

2 large or 4 small carrots, julienned
2 small yellow squash, julienned
2 cups mushrooms, sliced
1/2 lb whole wheat spaghetti (or rice noodles)
1/4 c peanut sauce (I used 365 Organic Peanut Sauce)
3 tbsp peanut butter (chunky or smooth)
2 tbsp chili paste (I would recommend using 1 tbsp for less heat or you can omit)
1 lime, juiced
2 cloves garlic, minced
1 handful cilantro, chopped
6 sprigs mint, chopped
6 stalks of chives, chopped
1/4 c peanuts, chopped

Heat two tablespoons oil in a large saucepan. Sautee carrots for 3 minutes. Add mushrooms and squash and sautee 3-5 more minutes. While vegetables are cooking, bring a pot of salted water to a boil and add noodles, cook for 8 minutes. Add in peanut sauce, peanut butter, garlic and chili paste. Stir peanut butter mixture together until well mixed. Add lime juice. Toss vegetables in sauce. When noodles have cooked, al dente, remove from water. Drain and add to vegetable mixture. Toss well and top with herbs and peanuts.


Saturday, May 23, 2009

Lime and Cilantro Potatoes with Zucchini


Zucchini and potatoes are abundant at the farmer's market. I remembered seeing a recipe with both in "Fresh Indian" by Sunil Vijakar. I am always trying to expand my entree repertoire, and thought this would be a great opportunity to try out a new Indian dish. 

I really enjoy this recipe, because it highlights simple produce, adding in tons of spices and herbs. Not only does this enhance the flavor of the dish, but spices and herbs are practically calorie-free.

Cumin, garam masala, and cilantro are popular flavors in Indian cooking, and some of my favorites in my own cooking. Some of you might be wondering what spices make up garam masala? It is usually a combination of cardamom, cloves, cumin, peppercorns, cinnamon, and nutmeg. That gives you an idea of what it will taste like. A little bit goes a long way. You can make your own, or just buy some. I got mine at the Indian grocery store nearby. But most supermarkets and Asian markets will have it as well. 

This dish is fresh and bright and a great way to get in some extra vegetables. Plus, who doesn't like potatoes and zucchini?


Lime and Cilantro Potatoes with Zucchini

1 tbsp olive oil
1 small onion, finely diced
2 tsp cumin seeds
2 garlic cloves, crushed
1 tsp freshly grated ginger root
1/2 tsp tumeric (I left it out)
1 1/4 lbs potatoes, cut into matchsticks and boiled until soft
1/2 c hot water
1 zucchini, cut into thick matchsticks and boiled
2 plum tomatoes, finely hcopped
1/2 tsp garam masala
1/4 c chopped fresh cilantro
juice and zest of one lime
salt to taste

Heat oil in pan and add onion. Stir-fry over medium heat for 5-6 min. Add cumin seeds, garlic, ginger, and tumeric. Stir-fry for 2-3 minutes and then add potatoes and water. Cook over high heat for 3-4 minutes, then stir in zucchini, tomatoes, and garam masala. Stir and cook on high for 3-4 minutes, remove from heat, and stir in chopped herbs and lime zest and juice. Season well and serve immediately. 

Friday, May 15, 2009

Falafel's Drive-In


Falafel Drive-In

It's amazing how tastes mature with age. While I have always loved chickpeas and hummus, I hated falafel. It took a trip to Basil in Charlottesville, VA to change my mind. Now, I totally dig falafel. One of my friends told me about a great falafel place in San Jose that was featured on Diners, Drive-ins, and Dives.

Falafel's Drive-In has been around since 1966, when the Nijmeh family moved to San Jose. They started out serving burgers, and then added their family recipe falafel to the menu. Customers have been raving about the falafel ever since.


AJ is stretching out his torso to prepare for lots of falafel.

The open-air seating was packed when we arrived on a late Sunday afternoon. As newbies we were a little thrown off by the two different lines that were forming. There is one to pick up your order and one to place your order. Don't forget to bring cash, they don't accept credit card!

The menu offers hamburgers and corn dogs, but the real treat is the falafel and other mediterranean fare. AJ ordered the special - a large falafel with a banana shake (no other flavors can be substituted for the special). The owner encouraged us to go with the banana, because it is the best flavor. I ordered a small falafel and then we sat down to wait for our number to be called.


Big bites!

The sandwiches came out quickly. The falafel comes in a pita pocket with cucumber, tomato, lettuce, hot sauce, and tahini sauce. This fast food version of falafel was real tasty! The falafel are fried to a nice brown with wonderful cilantro and garlic notes. These crisp balls stand up well to the huge quantities of sauces poured on top. I can't say the same for the pita bread, which began to disintegrate halfway through. While extremely messy, I thoroughly enjoyed the hot sauce - which seemed almost like a combination of sriracha and ketchup. While I'm not sure this is the best falafel I've ever had, I would certainly return.


These are extremely messy, but totally worth it.

The cold and creamy shake was a perfect compliment to the spicy falafel. AJ and I both agreed that the banana flavor was light and refreshing. Sometimes banana flavored things can taste so artificial, but this shake was the real deal.


Banana milkshakes are their most popular flavor.

Bottom Line: For a nostalgic drive-in experience and some darn good falafel, head on down to Falafel's Drive-In.

2301 Steven's Creek Blvd
San Jose, CA

Wednesday, May 13, 2009

Nopales (Cactus) Tacos


Nopales and sweet potato tacos with avocado and salsa.

When I head to my local farmer's market, I often try and find one item that I have never tried before. A couple of weeks ago I spotted nopales, aka prickly pear cactus. A common staple in Mexican cuisine, I had always wanted to try it. Our farmer told us that these cactus had already been removed of their spines, and were ready to eat. Apparently raw nopales are an excellent addition to salads.

I wasn't sure how I was going to use my cactus, until I saw Kim O'Donnel's recipe for sweet potato tacos. Surely cactus would be a great addition to any taco. Alright, I know what you're thinking - sweet potatos and cactus? How could those exotic flavors pair well together. Truth be told, I wasn't sure either, but I am all about trying new things.


These tacos are great topped with some fresh salsa.

I tweaked the recipe slightly, mashing up my sweet potatoes with some salt and a little garlic. I spread the sweet potato mash on corn tortillas, topped them with sauteed nopales, avocado, and fresh salsa. These tacos were packed with flavor. The nopales were amazingly tangy, almost like eating a fleshy lime. The smooth, almost creamy texture of the nopales worked well with the sweet potatoes. I made my own salsa with tomatoes, onions, jalapeno, cilantro, and garlic. The freshness and brightness of these tacos is just wonderful.


AJ loves nopales tacos!


Going in for the kill!

Fresh Salsa
1 large tomato, diced
1/2 onion, diced
2 cloves garlic, minced
1/4-1/2 cup cilantro, chopped
1/2 jalapeno, diced
salt and pepper to taste

Mix ingredients in a bowl. For a more pureed version, blend in food processor.

Tuesday, May 12, 2009

Vegetable Thai Red Curry


Red Curry with carrots, zucchini, bell pepper, and pineapple.

When I dine out at Thai restaurants, I am always tempted by the curry dishes. With its spicy thai chilis and sweet, fragrant coconut milk, curry offers complex, yet comforting flavors. In an attempt to broaden my dinner choices in college, I bought at thai recipe book. Since that acquisition thai red curry with pineapple has been one of my favorites to prepare. My go-to add-ins were shrimp, bell pepper, and pineapple. This time around I made it vegetarian.

The recipe is really simple, especially if you buy a pre-made chili paste. I have made my own in the past, which provides some amazingly fresh flavor. But the premade stuff is pretty good too. There are a couple items that you might not have on hand, like fish sauce, but trust me its worth purchasing. Fish sauce is a staple of thai cooking, so you will use it again and again. Read the recipe and figure out what items you will need to purchase before turning on your stovetop.


Simmering the red curry. Garnish with cilantro.

Thai Red Curry
Adapted from "Quick & Easy Thai: 70 Everyday Recipes" by Nanci McDermott

1 1/2 c unsweetened coconut milk
2 tbsp red curry paste (or more for super hot curry)
1/2 c water
2 tbsp fish sauce
1 tbsp sugar
1 cup drained canned pineapple chunks or bite size fresh pineapple
6 wild lime leaves (optional; I added the juice of 1 lime)
2 zucchini (sliced into half moons)
1 orange bell pepper (cut into bite size pieces)
2 carrots (sliced)
1/3 cup cilantro

In medium skillet or saucepan, heat 1/2 cup coconut milk over medium-hihg heat, stirring often, until thickened and gragrant, two to three minutes. Add red curry paste and cook a minute or two, pressing and stirring to dissolve it. Stir in remaining 1 cup coconut milk, the water, fish sauce, sugar, vegetables, and lime leaves (or juice). cook over medium heat until vegetables soften, 4-5 minutes. Add the pineapple and cook for another 2-3 minutes. Sprinkle with fresh cilantro. Serve over rice.


Thursday, April 23, 2009

"You can make me banana pancakes(or blueberry), pretend like it's the weekend...


Blueberry Buttermilk Whole Wheat Pancakes with Maple Syrup.

There is nothing like eating pancakes on the weekend. A sit-down breakfast with friends in the comfort of you own home is the perfect way to start a Saturday morning. I had just purchased some blueberries from the Farmer's Market, and I knew those would be great in some whole wheat pancakes. I used my friend the Gastronomer's recipe for buttermilk whole wheat pancakes, using white whole wheat flour.


Start by sifting the flour with the dry ingredients.

This recipe comes together in a cinch. Make sure you have all your ingredients lined up - like the buttermilk and eggs so you're not scrambling around in the morning. I didn't have buttermilk. But you can make your own! Just add two tablespoons of lemon juice and let it sit for 10 minutes or so. Then you can proceed with the rest of the recipe.


Wake up Justin it's time for pancakes!

When the batter comes to together, turn the oven on to 200 degrees. Grab a sheet pan and place it in the oven. This will provide a place to keep those pancakes warm. Heat a skillet on medium heat. Spread a dab of butter in the pan. I used a 1/4 cup to pour the batter forming about 5 in pancakes. The trick to adding the blueberries is to wait a minute until the batter has cooked on the bottom. Then you can sprinkle the blueberries on top and they won't roll away!


Batter is ready! Heat up that griddle!

I cooked my pancakes for 2-2.5 minutes on one side and then 1.5-2 minutes on the other side. You may have to adjust your heat depending on your stovetop. Keep an eye on those bubbles, this means its time to flip! When the pancakes is cooked through place it in the oven until you have made the whole batch.


I poured my batter in and after a minute or so of cooking, I added the blueberries on top.
I ended up with 6 pancakes - which was perfect for the three of us. These pancakes were light and fluffy, with a nice tartness from the blueberries. A little maple syrup adds the perfect touch of sweetness. We also served up some fresh strawberries on the side. Now that is my kind of breakfast.


Big Bites!