Sunday, January 20, 2013

Ad Hoc Inspired Salad - Beets, Avocados, Blood Oranges

Ad Hoc inspired salad.
This weekend AJ and I took a short trip up to Napa to see some East Coast friends of ours. When our friends invited us to dinner in Napa on a Friday night I was initially a little hesitant. Driving up to San Fran on a Friday from Mountain View is a nightmare, so Napa would only be worse. Plus, I had just taken a lot of time off for the holidays and wasn't sure about taking more time off from work. But then two very important things happened. First, our friends emailed to say they wanted to make reservations at Thomas Keller's Ad Hoc. And second, AJ said, "Are you saying you DON'T want to go to Napa?" Thank you husband of mine for slapping some sense into me.

"Bears, beets, battle star galactica."
 AJ and I had been to Ad Hoc for brunch two years ago during a trip to Napa with Malia. For those of you who have never been, Ad Hoc does a four-course, family-style, California cuisine. You are given no choice about what to eat, but I have never heard anyone complain about their meal. For brunch, we had their epic chicken and waffles. This meal was perfect after a day spent wine-"tasting" the entire day prior. So I was excited to experience their dinner.


Close up. Ahhh yeeeeaaah.
We arrived at dinner after a impromptu tasting hosted by Somerston winery at our hotel. The cab sav we tried was nice, but the reason I would visit their winery is for the opportunity to ride ATVs through their vineyard and hang with their sheep. Needless to say after a few glasses of vino, I was ready to eat. Luckily, we didn't have to figure out what to eat! AJ and I decided to split the wine pairing. Our first course was the salad, which turned out to be my favorite part of the meal. I know that sounds crazy, but the salad featured perfectly ripe avocados, blood oranges, golden beets, toasted hazelnuts, pomegranate seeds, mixed greens, and quinoa. The dressing was a citrusy vinagrette and we were offered a creme fraiche to drizzle over top. This salad was creamy, crunchy, bright, tart - essentially exploding with flavor, but perfectly balanced. While the dishes that followed - the pork, cheese plate, and apple crisp - were all delicious, I knew I wanted to recreate that salad.


Flavors melding in the bowl.

The salad I recreated on Sunday was an inspiration, not to be confused with a replica. I used some ingredients I had on hand, supplemented by purchases at the farmer's market. The focus was on avocados, beets, and blood oranges (Side note: I can't think of beets without thinking of Jim's imitation of Dwight on the Office.) I added some mixed greens, thin slices of fennel, and toasted almonds to the mix. I dressed them with a meyer lemon and garlic vinagrette. I also made a "creme fraiche" dressing in addition. At Ad Hoc they served the salad with a side bowl of an herby creme fraiche. I didn't have creme fraiche, so I mixed pepper goat cheese with olive oil mayo and meyer lemon juice. It was delightful. I love when you can find inspiration at restaurants and recreate the dish in your own home. I served this salad with a nice slice of pain au levain and a Torrontes wine. NOMS!


Saturday, January 12, 2013

Braised Swiss Chard and Cannelini Beans (Zimino Di Bietole E Fagioli)

Perfect winter meal.

Week 2 of writing a new blog post a week! My goal is to cook a new recipe and post about it each week. I have a plethora of cookbooks that I haven't made a dent in. My mom got me "Lidia's Italy", written by Lidia Bastianich, last Christmas. Lidia takes us on a culinary tour of Italy (and Istria, where she grew up, which is now part of Croatia) - traveling to 10 regions from Piemonte to Puglia. For someone who has only traveled through Tuscany, her book provided me with a great overview of the different regions and the distinct cultures that separate them. 

I perused Lidia's recipes looking for something hearty, warm, and healthy. When I came across her Braised Swiss Chard and Cannelini Beans (Zimino Di Bietole E Fagioli - for those of you who want to learn a little Italian) I knew I had found a winner. This dish comes from the Tuscan region called Maremma (My mom may know Maremma for its Vermentino wine). Swiss chard is always available at our local farmer's market, but I never know what to do with it. This was a perfect time to incorporate it into a meal.

The dish takes a little preparation time, as the dried beans require soaking overnight. I put them in a pot of water right before I left for work and they were ready to go when I got home.   The dish comes together pretty easily. First, you cook the beans for 40 minutes. With 10 minutes to go I started boiling the swiss chard. When the beans are done, you heat olive oil, sliced garlic, and pepperoncino flakes (I used red pepper instead) in a dutch oven pot. Then you toast a couple tablespoons of tomato paste. After that you add a can of crushed tomatoes (I subbed a can of chunky tomato soup) and bring to a boil. Then you add the beans and finally the swiss chard. I added the juice of half a lemon and fresh oregano at the end. 

The dish was simple but delicious. Cooking beans from scratch is way better than canned beans - they don't have that mushy texture.  The swiss chard was like a heartier spinach and the tomato sauce added a rich acidity to bring the dish together. I topped it with a little fresh pecorino and served it with toasted bread. A little wine and you have a complete meal! Plus, this dish tasted even better the next day. I had several delicious and healthy lunches for the rest of the week.


Saturday, January 5, 2013

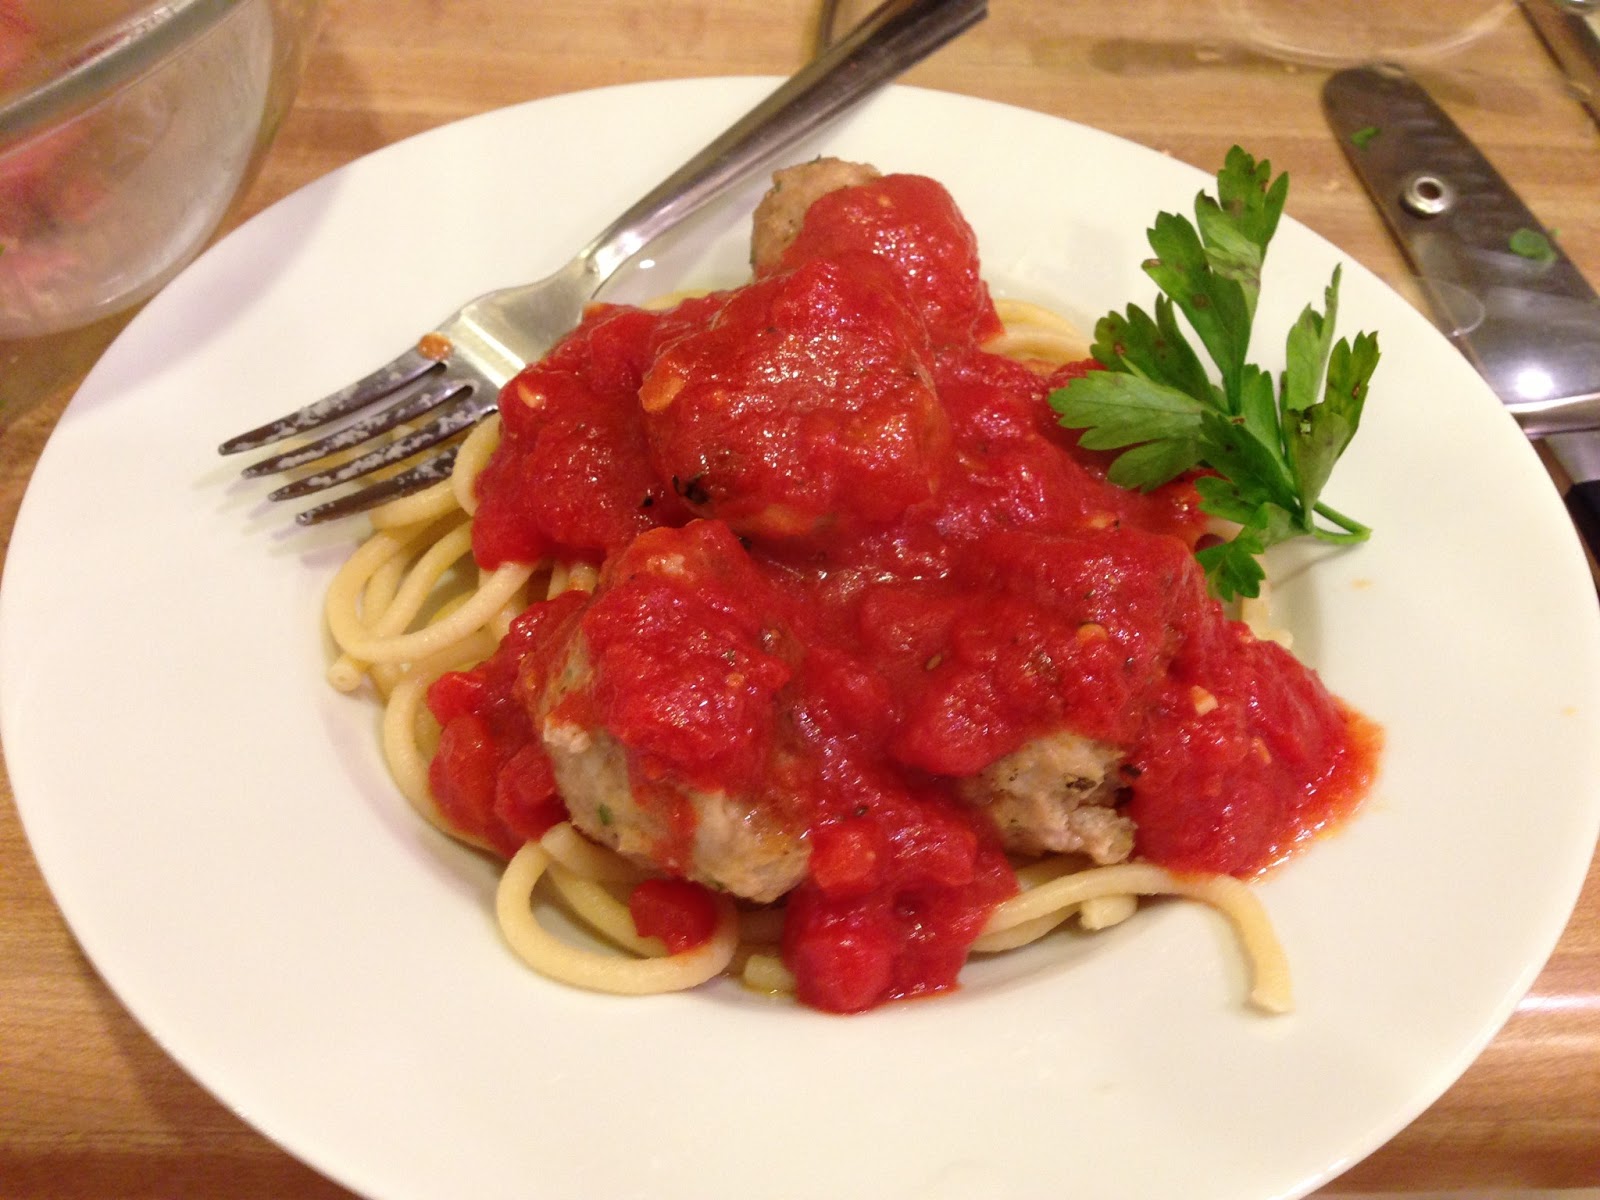
Bucatini and Meatballs

Perfection on a plate.

The start of a New Year brings new resolutions, like writing more in your food blog. Writing and cooking bring me a sense of accomplishment and calm. It must be something about working with your hands. So in 2013 I am trying to cook a new recipe a week, which will hopefully be followed by a blog post. 
Spaghetti? Nah, try the thicker, chewier Bucatini!

I started off the year sick and eating large quantities of soup, so I was craving something a little heartier for my first home cooked meal. Spaghetti and meatballs sounded perfect. I had never made meatballs before, nor was it something that we ate much of growing up. My mom always served a meat sauce or a simple marinara with our pasta. However, living in San Fran, AJ and I stumbled upon a quaint Italian restaurant, Emmy's Spaghetti Shack. The restaurant has a fun vibe that is anything but your typical Italian place (think panties on the wall kind of atypical). Their spaghetti and meatballs made me realize what all the hype was about. It was with Emmy's in mind that we went about making our own meatballs. A simple google search for the best meatballs served as the starting point.

Not just 1 kind of meat, but 3 kinds of meat (beef, pork, veal)!
We headed to the store and got 1/2 pound each of ground beef, pork, and veal (AJ said this was the secret ingredient). Meatballs are fairly easy to make, kind of like a meat loaf, but mini! You toss together meat, breadcrumbs, cheese, parsley, egg, garlic, and pepper. A few things we did differently - we went with a 6-serving size, used more meat, reduced the cheese (pecorino) to half a cup, omitted salt (the cheese was super salty), added pepper, and subbed panko for regular breadcrumbs. I read somewhere that panko makes for better meatballs. And instead of frying, we baked these at 425 degrees for 10-12 minutes.


Is there sugar in that? Then yes! Sugar is the secret ingredient.
While the meatballs were cooking and the pasta water boiling, I started on a simple marinara. I heated 1/3 cup of olive oil on medium high, and sauteed 2 cloves of garlic, with a teaspoon of red pepper flakes. Then I added 1 tablespoon tomato paste and cooked that for a minute. Then I added a 32 oz can of crushed San Marzano tomatoes, a few spoonfuls of pasta water, and reduced the heat to medium. As I was tasting I felt the sauce needed a little balance to the salt and acidity. I added a tablespoon of sugar, which softened the flavors. Then I added ground pepper and chopped fresh oregano and parsley toward the end. 

We served our spaghetti over fresh bucatini instead of spaghetti. I really enjoyed the bucatini. It is thicker and chewier than spaghetti which really went well with the large meatballs. We used the leftover meatballs for subs the next day. Happy nomming and happy new year!

Tuesday, June 19, 2012

Father's Day Fried Chicken & Waffles

I think we've all heard the saying, "the way to a man's heart is through his stomach." My mom has been keeping my Dad's heart and stomach full for many years, and this Father's Day was no exception. She decided to enlist my help in making something extra special for him - fried chicken and waffles!

 My mom is one of the best cooks I know, and she can usually whip up a recipe on the fly with no help from any cookbook, website or magazine (she's just that talented!; but when it came to fried chicken and waffles we decided to rely on the help of a well known southern chef, Emeril Lagasse, to guide us through this frying excursion.


Emeril's recipe called for marinating the chicken in a buttermilk, garlic and hot sauce solution overnight to ensure that the chicken is moist and flavorful before getting that bath in sizzling oil. Once the chicken has been soaked overnight, you drain the excess liquid off the chicken and coat it in all purpose flour. We decided to kick up the flavor an extra notch (bam!) by adding "Emeril's essence" to the all purpose flour. The "essence" is a mixture of spices and herbs, including cayenne pepper, paprika, thyme, oregano, onion and garlic powder, salt and pepper. We threw in some rosemary and Italian seasoning to the mix as well, and this layer of extra flavor in the crunchy coating really comes through once that chicken is fried.

 We relied on his recipe found here:  http://abcnews.go.com/GMA/recipe/emerils-fried-chicken-buttermilk-waffles-black-pepper-maple-16203096

The part we were most scared about was the actual frying technique. We had very little experience in the realm of fried foods, normally we just rely on Panko bread crumbs topping baked chicken or pork chops when we are craving something extra crispy. The key to getting an even golden brown, crunchy coating and a moist, meaty interior is in the temperature of the oil. You need to get that oil heated up to 350° F.  Any hotter would result in a burnt crust and under cooked chicken, while a lower temperature would take much longer to get a nice crust and the chicken might overcook and soak up too much oil, resulting in a greasy mess. We used a deep cast iron skillet and poured the oil until it was about 1 inch up the side of the pan, and once the thermometer read 350, we gently placed two chicken breasts in at a time. 


The first batch didn't cook for long enough so we finished them off in the oven, but once we got the hang of frying and figured out the "golden" number of minutes, we reached the perfect crunchy consistency. We made sure to adjust the temp if the oil over time if it was getting too hot or cooling off a bit. As we fried of the chicken, we cooked up the waffles in the waffle maker. It was a simple buttermilk batter that was just a tad tangy and sweet. We served up the chicken and waffles with warm maple syrup, fresh bing cherries on the side and mimosas. It was a wonderful celebratory brunch that hit all the right sweet and savory notes. Serve up this dish to your loved ones and there's no way you won't have a happy and content crowd!

Sunday, April 1, 2012

Cheddar Leek Souffle


Look at it rise!

Nothing like a souffle to inspire the return to the blog! I took a trip to the Farmer's market on this blustery spring day and was just soaking in all the lovely spring fare - leeks, asparagus, and fresh eggs! I ended up with some arugula, sweet potatoes, cara cara oranges, and some strawberries to boot. I wasn't sure what I was going to make for dinner, but I knew it would be inspired by Spring.


Coating the ramekins with butter and parmesan cheese.

I recently received the March Bon Appetit mag issue, which had a recipe for the loftiest souffle. When I hear souffle I certainly think of a lofty, airy mountain of eggy goodness. The recipe is a basic cheese souffle with gruyere and parmesan. I wanted to go with a spring theme so Id incorporated leeks and cheddar. I sauteed three small leeks in butter with salt and pepper. I subbed cheddar for gruyere. You sprinkle the bottom of the ramekins with parmesan which creates this beautiful crust.


Don't forget to wash your leeks, they are dirty!

Souffles are intimidating - and this recipe may seem a bit involved. What I have to separate the yolks from the whites and I then I have to make a bechamel? But as long as you get everything prepped and ready to go, this recipe comes together fairly easy. It does help to save this for a lazy Saturday or Sunday.


Happy chef.

Not too shabby for my first souffle. The subtle oniony flavor of the leeks works wonderfully with the cheddar and parmesan. And the cheese on the sides and top creates this wonderful brown, flavorful crust. Souffle - so rich yet so light. I served these up with lemon asparagus and a nice cab/shiraz. Hellllooo Spring. This could work well for an easter dinner or a nice brunch.


All gone.

Monday, October 24, 2011

Three Words: Bourbon - Chocolate - Pecan


It's been awhile since I've made a pie from scratch. Ever since I rewatched Waitress with Keri Russell I've been itching to make a pie with a catchy name like, "I Hate My Husband Pie" or "Earl Murders Me Because I am Having an Affair Pie". It's actually hard to think of cool pie names that aren't negative though. I like to call this pie, "Three Shots for Pie One Shot for Me" Bourbon Chocolate Pecan Pie. I mean come one its what Julia Child would do.


Roll with it.


While my pie-naming skills may need some work, this recipe from David Lebowitz will make anyone look like a pie wizard. The crust is the hardest part of this recipe. But fear not ladies and gentleman with the help of a food processor anyone can make this pie. (NOTE: I made a little extra dough, because I like THICK crusts and I cannot lie.) You essentially throw flour, a spoonful of sugar, salt, a stick of cold butter, and cold water into a food processor and bam - pie dough is made.

The trick with the pie dough is keeping it cold enough so that the butter doesn't melt while you roll it out. After at least 30 minutes in the fridge you roll it out and place it in a pie plate. Then you refrigerate it again for at least 30 minutes (or until firm). You want the crust pretty cold when it goes in the oven, so the butter doesn't melt and your crusts look like blobs. I skimped a little on the time and you can see my crusts are a little flat (I mean RUSTIC). Seriously though, if your pie crusts fall a bit, just tell everyone you prefer the rustic aesthetic. People love that stuff.


I be up in the fridge just workin' on my chillness.


Mmm toasty.


Isn't that pumpkin just perfect for this still life.

While your pie crust is getting firm you can start on the filling. The most time consuming portion is toasting the pecans. Be sure to watch those nuts, you don't want them to burn! Make sure to toast some extras for snacking. It will go great with the shot of bourbon. For the filling you whisk together a lil bourbon (I used Bulleit Bourbon, but you don't have to go fancy as you're baking this), dark brown sugar, eggs, corn syrup, salt, and butter. Don't forget to give yourself some bourbon! Then you stir in the pecans and some bittersweet chocolate chips. You pour the filling into the pie crust and then pop it in the oven for 55 minutes or so on 375.


Bourbon, chocolate, pecans - oh my!

If you're like me and you're bringing this pie to a party or event, a long car ride is the perfect amount of time it needs to cool down. Your pie will still be warm on arrival, and everyone will thank you for your procrastination. Consider it for your Thanksgiving dinner you will be the hit of the party (or at least your pie will be).

Sunday, September 11, 2011

Happy Birthday AJ! - Funfetti Cupcakes


Funfetti Cupcakes with pink vanilla buttercream and chocolate buttercream.

Wow it has been awhile. I have been seriously absent from blogging, which I'd like to blame on a couple of things: work, school, and wedding planning. But I'm not one for excuses, so I will just say it's good to be back.

I think it is rather appropriate that my first entry after quite some time involves cupcakes. I have posted a number of cupcake-related entries. Magnolia, Sprinkles, and Georgetown Cupcake brought about a cupcake resurrection as it were - making cupcakes not just for kids, but for adults too. For awhile it seemed that cupcakes were all the rage, you couldn't go anywhere without some bakery or restaurant peddling their version of the cupcake. I don't know about you, but for a little while I was "cupcaked out." But in recent months I've found myself looking at cupcakes with fresh eyes and a fresh tummy. There's a reason cupcakes are popular - they're individual sized, cute, and when done well they're just the right amount of fat and sugar to send you on a dessert high.


Fresh from the oven - those sprinkles sure are pretty!

If you think it's been awhile since I blogged, it has been even longer since I baked a cupcake (perhaps AJ's last birthday?) But with another birthday on the horizon I felt inspired to make cupcakes. I thought about doing something traditional (red velvet) or maybe something gourmet (mexican chocolate), but decided to just go with fun (fun-fetti that is)! I had never made a funfetti cupcake from scratch. I think most of us have just resorted to the Pillsbury box cupcakes. But a birthday for someone as special as AJ deserves homemade (I know I'm a snob).


I think I managed to get frosting and sprinkles all over my clothes.

AJ loves chocolate so I knew I would do a chocolate frosting. But to me funfetti cupcakes need pink frosting. My friend Kim used to make funfetti cupcakes all the time in high school and they were awesome. And guess what she always had pink frosting! So, I divided the frosting in half and added unsweetened chocolate to one half and red dye to the other.


Birthday Boy!

The funfetti cupcake recipe was from a blog called Sweet Tooth, which is rather appropriate. I substituted cake flour for AP flour (just add an extra 2 tbsps for every 1 cup). In her recipe she forgets to tell you where the milk should go. My mother taught me well, so I remembered that you alternate flour and milk, beginning and ending with flour.

The cupcakes turned out well and were a hit at our bbq. I think the cake was a lil dry, but overall these were a lot of fun to make and eat. The chocolate frosting was pretty awesome (go Joy of Baking), I ended up eating the cold leftovers out of the bowl the next day. Almost like a quick fudge. NOMS. Happy Birthday AJ, Jenny, Natalie, Cammy, and Mom - love to my September favs!


Indulge your inner child - make some funfetti cupcakes.